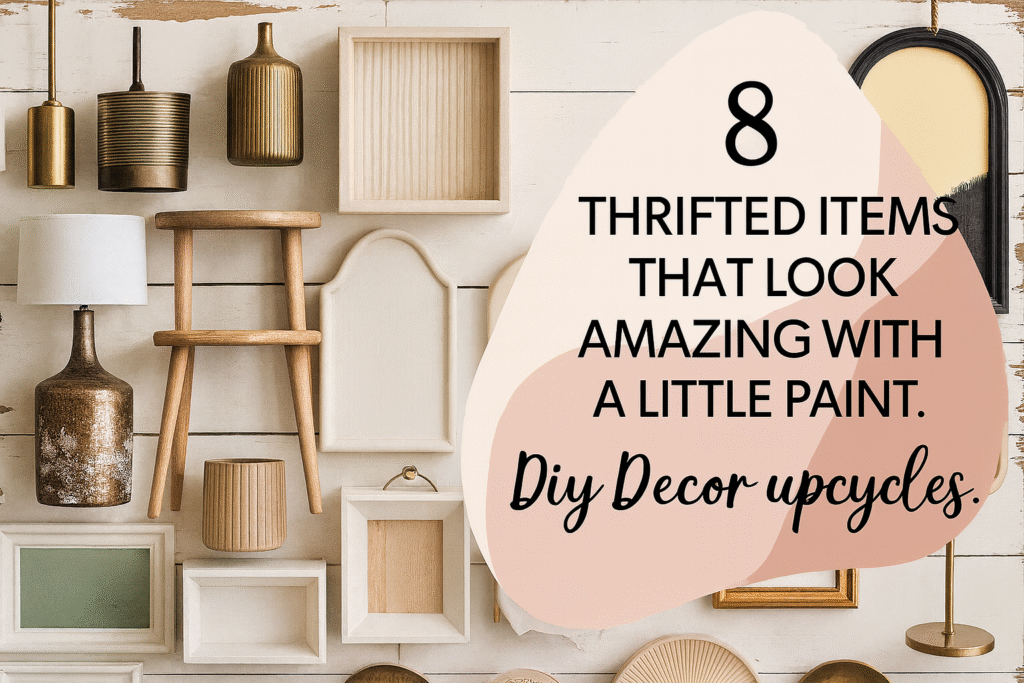
If you know me, you know I’m obsessed with the magic of a good thrift flip. There’s something incredibly satisfying about taking a $5 find and turning it into something that looks straight out of a designer catalog. And guess what? Most of the time, all it takes is a few coats of paint, a good brush, and a little imagination.
Whether you’re shopping at Goodwill, estate sales, or that one quirky local thrift shop with the squeaky floorboards — keep your eyes peeled for these 15 treasures. Each one has serious glow-up potential with just a little paint love. 💅
1. Old Picture Frames — The Secret Weapon of Every Thrift Flipper
Okay, let’s talk about one of the most underrated thrift store finds ever: picture frames. You’ve probably walked past them a hundred times — stacks of faded art prints, family portraits from the ‘90s, and frames coated in that yellowing “grandma varnish.”
But here’s the secret: these frames are gold mines waiting for a makeover. You just need to know what to look for, and how to give them new life.
🕵️♀️ What to Look for at the Thrift Store
When you’re thrifting, skip the print inside and focus on structure:
- Material matters: Look for wood or metal frames — they hold paint better and have that satisfying weight that makes them feel high-end. Plastic can work too, but it takes a bit more prep.
- Shape & detail: Curved edges, ornate corners, beaded trims — these little details pop beautifully once you paint them.
- Condition check: Avoid frames with cracks or missing chunks, but small chips or scratches? Totally fine (you can fill or sand those easily).
- Glass or no glass: If it has glass, great! You can turn it into wall art or a dry-erase board. No glass? Perfect for open-style framing or turning it into something totally new.
Pro tip: Ignore the color. That dated faux gold or shiny cherry red? You’re going to paint right over it anyway.
🧽 Step-by-Step: How to Give Old Frames a Glow-Up
- Remove everything — Take out the old print, glass, and backing. You just want the frame itself.
- Clean it — Wipe down with warm soapy water or a vinegar solution to get rid of dust and grime.
- Sand lightly — Especially if it’s glossy. This helps the paint stick better.
- Prime (optional but smart) — Use a primer spray or a chalk paint base coat for the best coverage.
- Paint time!
- Spray paint gives a smooth, even finish — perfect for metallics or modern looks.
- Acrylic or chalk paint gives you that soft, brush-stroke, hand-painted vibe.
- Seal it — Finish with a clear matte or satin sealant to protect from chips and scratches.
✨ Paint Ideas That Always Work
- Matte Black: Instant modern upgrade. Looks incredible in gallery walls.
- Antique Gold: Classic and rich — use rub-on metallic wax to make the details pop.
- Chalk White: For that cozy cottagecore or French farmhouse aesthetic.
- Bold Color Pop: Deep emerald, navy, or blush pink for something unexpected and fun.
🌿 Bonus Ideas for Repurposing Frames
Don’t stop at just framing art. You can…
- Add corkboard or chicken wire for a cute photo display board.
- Insert a mirror for a custom vanity accent.
- Use chalkboard paint inside for a kitchen message board.
- Layer empty frames on a wall for a statement art installation.
2. Wooden Chairs — From Mismatched to Magazine-Worthy
If you’ve ever scrolled through Pinterest and swooned over those dreamy “mismatched dining chairs” setups, here’s the secret: most of those start out as cheap thrift finds. Wooden chairs are absolute DIY gold — sturdy, versatile, and practically begging for a coat of paint.
Whether you’re going for cozy cottagecore, modern farmhouse, or boho brunch vibes, thrifted chairs can easily become the centerpiece of your space.
🕵️♀️ What to Look for at the Thrift Store
When you’re chair hunting, think potential, not perfection.
- Solid wood only: Tap the seat — if it sounds hollow, it’s probably particleboard. Real wood can be sanded, repaired, and repainted beautifully.
- Sturdy structure: Sit on it! Wobble a bit. If it creaks slightly, that’s fixable — but if the joints are splitting or legs are loose beyond repair, skip it.
- Interesting shapes: Ladder-backs, spindle chairs, curved details — these all pop once they’re painted.
- Flat surfaces: Smooth seats and backs are easier to sand and paint evenly.
- Avoid fabric seats (unless you want to reupholster). But if the frame is great, don’t be afraid to remove the cushion and start fresh.
Pro tip: Don’t worry if the set doesn’t match. Eclectic collections painted in a unified color palette look intentional and oh-so-chic.
🧽 Step-by-Step: How to Give Thrifted Chairs a Paint Makeover
- Clean thoroughly — Dust, grime, and furniture polish buildup can prevent paint from sticking. Use a degreaser or diluted vinegar mix.
- Tighten joints — A few drops of wood glue and some clamps can make an old chair rock-solid again.
- Sand it down — Focus on removing shine, not perfection. Medium-grit sandpaper (like 120) works great.
- Prime it — Primer helps prevent bleed-through and gives your color even coverage.
- Paint time!
- Chalk paint is ideal for that matte, vintage feel — no heavy sanding needed.
- Milk paint gives a naturally distressed, farmhouse vibe.
- Spray paint works well for modern, smooth finishes (especially on spindles).
- Seal it — Finish with a water-based polyurethane or wax for durability, especially if it’s a dining chair.
🎨 Paint Ideas That Always Work
- Classic White: Always fresh and clean, perfect for minimalist or cottage spaces.
- Deep Navy: Pairs beautifully with brass or gold accents.
- Sage Green or Dusty Blue: Soft, calming, and ideal for vintage kitchens or porches.
- Matte Black: Instantly modern — gives even the most traditional chair a bold edge.
- Color Mix: Paint each chair a different shade within the same palette for that “collected over time” look.
🌿 Bonus Ideas for Repurposing Chairs
Don’t stop at dining rooms — wooden chairs can do so much more:
- Use one as a bedside table — perfect for stacking books or a morning coffee cup.
- Turn an old chair back into a towel rack or wall hook by mounting it.
- Use mismatched chairs outdoors, sealed with exterior paint, for a whimsical garden setup.
- Paint just the legs or seat for a stylish dipped-paint effect.
3. Lamps + Lamp Bases — Glow-Ups That Light Up the Room
There’s a reason every DIY influencer seems to have a lamp makeover in their feed — because they’re ridiculously fun to flip. Lamps are one of those thrift store staples that always look a little sad on the shelf but can become serious statement pieces with the right paint job. From bold modern makeovers to chic vintage revamps, lamps offer instant gratification and big design payoff.
🕵️♀️ What to Look for at the Thrift Store
When you’re thrifting for lamps or bases, it’s all about the bones:
- Shape over color: You can always change the finish — what matters is the silhouette. Look for elegant curves, geometric lines, or funky mid-century shapes.
- Weight check: Heavy = quality. Ceramic, metal, or wood bases are ideal. Lightweight plastic? Still usable, but you’ll need good primer and paint.
- Electrical safety: Always check that the cord isn’t frayed and the plug isn’t cracked. A wobbly socket can be replaced, but burnt wiring is a no-go.
- Shades: Don’t stress if the shade is stained or dated — you can replace it, re-cover it with fabric, or even paint it for a quick transformation.
- Pairs: Matching lamps can be rare gold at thrift stores. Grab both if you find a set — they’re perfect for bedside tables or a balanced console look.
Pro tip: Plug it in before buying if possible. A working lamp saves you a wiring project later.
🧽 Step-by-Step: How to Paint and Refresh a Thrifted Lamp
- Disassemble first — Remove the shade and any detachable hardware. You’ll just be working with the base.
- Clean thoroughly — Lamps collect dust and oils. Wipe with a damp cloth or use rubbing alcohol to remove residue.
- Tape it off — Cover the cord, socket, and any metal details you don’t want painted.
- Prime (if needed) — Use a spray primer for glass, ceramic, or metal bases. This ensures the paint adheres properly.
- Paint your base:
- Spray paint: Gives smooth, even coverage and comes in endless finishes — matte, glossy, metallic, textured.
- Acrylic or chalk paint: Great for adding character or texture, especially for boho or farmhouse looks.
- Optional: Add texture! Try baking soda paint (mix baking soda into acrylic paint) for that high-end pottery effect everyone loves.
- Seal it: If the lamp will be handled a lot, finish with a clear matte or satin topcoat.
🎨 Paint Ideas That Always Work
- Matte Black: Clean, modern, and perfect for dramatic contrast against light walls.
- Terracotta or Clay: Warm, natural tones that give ceramic lamps an artisan feel.
- White Chalk Paint: Timeless and fits effortlessly into any decor style.
- Metallic Gold or Brass: Instantly elevates a plain base to something luxe and designer-inspired.
- Two-Tone: Paint the bottom half one color and leave the top neutral (or vice versa) for a dipped or color-blocked effect.
🌿 Bonus Ideas for Repurposing Lamps
- No shade? No problem. Try a modern exposed bulb or wrap the top with rattan or jute for texture.
- Paint the lamp shade itself! Use fabric paint, stencils, or ombré techniques for a custom designer look.
- Turn a lamp base into a plant stand by removing the wiring and topping it with a small tray.
- Mix and match bases + shades — thrift different pieces and create unique combos that look intentionally styled.
4. Ceramic Vases + Jugs — From Dated to Designer Chic
If there’s one thrift store aisle you should never skip, it’s the one lined with old vases and jugs. They may look outdated — think 1980s florals, glazed swirls, or that odd seafoam green everyone’s grandma loved — but underneath all that? Solid shapes, sculptural forms, and amazing upcycling potential. A little paint can transform them into high-end home décor that looks like it came straight from a boutique pottery studio.
🕵️♀️ What to Look for at the Thrift Store
When you’re browsing the vase section, focus on shape, texture, and size rather than color or design:
- Material: Ceramic, clay, or terracotta are ideal because paint grips beautifully to them. Avoid glass unless you plan to use special glass paint or primer.
- Shape: Go for organic silhouettes — rounded, asymmetrical, bulbous, or jug-style forms. Simple cylinder vases also make great canvases for bold designs.
- Texture: Smooth surfaces are perfect for modern looks; ribbed or embossed textures look incredible with matte finishes.
- Weight: A good, heavy vase feels substantial and usually signals quality.
- Flaws are fine: Small chips or scratches disappear under paint; cracks that go through the piece, though, are a dealbreaker.
Pro tip: Pick up a few different sizes that complement each other. Painted in the same color palette, they’ll create a cohesive, designer-looking cluster.
🧽 Step-by-Step: How to Paint Thrifted Vases
- Clean first — Remove dust, stickers, and residue with warm soapy water. For greasy spots, wipe with rubbing alcohol.
- Sand lightly (optional) — If the glaze is very shiny, a quick scuff with fine-grit sandpaper (220) helps paint stick better.
- Prime (optional but smart) — A spray primer ensures coverage and helps prevent peeling, especially on glossy ceramics.
- Choose your paint:
- Chalk paint: For that velvety matte pottery look.
- Acrylic + baking soda mix: Creates a textured, high-end finish (1 part paint to 1 part baking soda).
- Spray paint: Smooth and fast — perfect if you want uniform color or a metallic finish.
- Paint in thin layers — Let each coat dry completely to avoid streaks.
- Seal it (optional): If your vase will hold real flowers or water, seal the inside with a waterproof resin or clear coat. For décor-only pieces, a matte sealer is enough.
🎨 Paint Ideas That Always Work
- Matte Neutrals: Shades like ivory, taupe, greige, or warm clay create that timeless minimalist look.
- Earth Tones: Terracotta, sand, rust, and olive — perfect for a natural, organic vibe.
- Stone Effect: Use textured spray paint for a faux-concrete or plaster finish.
- Bold Pops: Go for mustard yellow, cobalt blue, or blush pink to brighten a shelf or entryway.
- Metallic Touches: Try adding a gold or copper rim for a designer finish.
🌿 Bonus Ideas for Repurposing Vases + Jugs
- Cluster them: Mix sizes and heights on shelves, mantels, or coffee tables for a styled, curated look.
- Use as planters: Add small succulents or dried pampas grass for an earthy aesthetic.
- Create candle holders: Shorter vases or wide-mouth jugs can hold pillar candles for cozy ambiance.
- Stencil or hand-paint patterns: Try minimalist line art, geometric shapes, or simple florals for a unique twist.
- Mix textures: Pair matte-painted vases with glossy unpainted ones for that art-gallery contrast.
5. Side Tables — The Ultimate Statement Piece Makeover
Side tables are the unsung heroes of home décor — small enough to experiment with, but impactful enough to change a whole room’s vibe. And thrift stores are overflowing with them. From dated oak end tables to forgotten nightstands, these little furniture gems are perfect for a quick weekend paint project that looks straight out of a designer lookbook.
🕵️♀️ What to Look for at the Thrift Store
When browsing, think beyond the surface — you’re looking for shape, size, and stability:
- Material: Solid wood or MDF with sturdy joints. Avoid anything water-damaged or too warped to sand flat.
- Leg style: Mid-century tapered legs, chunky cottage legs, or minimalist straight lines all take paint beautifully.
- Surface condition: Scratches and scuffs are no big deal; deep gouges or peeling veneer may need extra prep.
- Storage bonus: Drawers or lower shelves add practicality — and give you more surfaces to paint!
- Size: Smaller tables are great for beginners and quick flips; bigger ones make bold statements in living rooms.
Pro tip: Don’t overlook ugly finishes — a high-gloss cherry red or faded orange wood can transform completely with a coat of matte paint.
🧽 Step-by-Step: How to Paint and Refresh a Thrifted Side Table
- Clean thoroughly — Remove dust, oils, and old residue with a mild degreaser or vinegar-water mix.
- Repair + tighten — Check all screws and joints. Add wood glue if needed for stability.
- Sand it down — Use medium-grit sandpaper (120–150) to dull shiny finishes and smooth imperfections.
- Prime (especially for dark wood) — Prevents bleed-through and helps paint adhere evenly.
- Paint it up:
- Chalk paint: Great for a distressed or matte farmhouse finish.
- Latex paint: Durable and smooth, perfect for modern styles.
- Spray paint: Fast and flawless for sleek, contemporary pieces.
- Optional: Add details — Tape off sections for color-blocking, stencil a pattern, or use gold leaf on drawer pulls.
- Seal it: Use a polyurethane or wax finish for protection — especially for tabletops that see daily use.
🎨 Paint Ideas That Always Work
- Matte White: Clean and crisp — pairs with everything.
- Olive Green or Deep Teal: Adds mood and sophistication to an otherwise simple piece.
- Blush or Terracotta: Soft tones for a modern-boho feel.
- Charcoal or Black: Sleek, modern, and instantly elevates a dated design.
- Two-Tone Finish: Paint the legs one color and the top another for visual contrast.
🌿 Bonus Ideas for Repurposing Side Tables
- Nightstand Makeover: Add a basket underneath for cozy bedroom storage.
- Plant Stand: Use a small round table for a chic indoor garden corner.
- Bar Cart Alternative: Paint, add wheels, and top with trays for a mini drink station.
- Entryway Drop Zone: Pair a painted table with a thrifted mirror and tray for keys and mail.
- Mix + Match Sets: Paint two mismatched tables in complementary tones for an intentionally eclectic look.
6. Mirrors — Reflecting Style and Creativity
Mirrors are one of the most transformative thrift finds you can score. Whether it’s a grand vintage frame or a simple bathroom mirror with potential, a little paint can turn any mirror into a stunning statement piece. The best part? You’ll often find them hiding behind old artwork or stacked awkwardly in a corner — just waiting for someone with a creative eye to bring them back to life.
🕵️♀️ What to Look for at the Thrift Store
When mirror hunting, focus on frame quality and style first:
- Frame material: Wood, resin, and metal frames all take paint beautifully. Avoid thin plastic frames unless you’re going for a quick spray paint fix.
- Condition: Cracked or chipped mirrors can sometimes be replaced, but you’ll save time (and frustration) if the glass is intact.
- Shape: Round mirrors bring softness; rectangles feel modern and structured; ornate vintage shapes add drama.
- Size + proportion: Big mirrors can visually expand small rooms, while smaller ones make great wall clusters.
- Hidden gems: Don’t skip framed mirrors with outdated finishes — gold leafing, metallics, or matte paint can totally change the vibe.
Pro tip: Check the back! Older mirrors often have heavy-duty wood panels — perfect signs of quality craftsmanship worth restoring.
🧽 Step-by-Step: How to Paint and Refresh a Thrifted Mirror
- Remove the glass (if possible) — This makes painting cleaner and avoids overspray. If you can’t remove it, tape it carefully with painter’s tape and cover the center with paper.
- Clean thoroughly — Dust, polish residue, or old paint can prevent adhesion. Wipe the frame with a degreaser or vinegar-water solution.
- Sand lightly — A quick scuff with 150–220 grit sandpaper helps paint stick better.
- Prime (optional but recommended) — Especially for shiny or metal surfaces. Use a spray primer for smooth, even coverage.
- Paint it:
- Chalk paint for an antique, textured finish.
- Spray paint for a flawless modern metallic or matte look.
- Acrylic paint + dry brushing for adding depth and highlighting carved details.
- Add detail (optional): Rub metallic wax (gold, bronze, or silver) over raised areas to bring out dimension.
- Seal it: Use a matte or satin topcoat to protect your work and prevent chipping.
🎨 Paint Ideas That Always Work
- Matte Black: Adds bold contrast and looks amazing in modern interiors.
- Antique Gold: Perfect for ornate frames — pairs well with vintage or glam décor.
- Soft White or Cream: Light and airy, ideal for cottage, coastal, or minimalist spaces.
- Muted Sage or Dusty Blue: Adds subtle color without overwhelming.
- Two-Tone Layer: Paint a base color, then lightly brush a metallic or lighter shade on top for a distressed effect.
🌿 Bonus Ideas for Repurposing Mirrors
- Gallery Wall Magic: Mix painted mirrors of different shapes and sizes for a curated, reflective wall art display.
- Dresser or Vanity Upgrade: Place a repainted mirror above a thrifted dresser for a custom, cohesive set.
- Entryway Statement: Paint the frame to match your front door for a pulled-together look.
- Outdoor Decor: Use a sealed mirror in a garden or patio space to add light and visual depth.
- Tray Transformation: A small framed mirror can be turned into a glam vanity tray — just add handles or felt pads underneath.
7. Bookshelves — Turning the Ordinary Into Art
Thrifted bookshelves are one of the easiest (and most satisfying) DIY paint projects you can take on. Whether you find a tall, traditional unit or a short, boxy cubby shelf, these pieces are perfect for creative makeovers. A little color, texture, or pattern can completely transform a boring bookshelf into a show-stopping piece that ties your whole room together.
🕵️♀️ What to Look for at the Thrift Store
When hunting for your next bookshelf flip, keep these tips in mind:
- Structure first: Make sure it’s sturdy. A slight wobble can be fixed with wood glue or new screws, but deep cracks or sagging shelves are red flags.
- Material: Solid wood is ideal, but MDF and laminate can work too with the right prep (hello, primer!).
- Shape & size: Think about where it’ll live — tall ones for living rooms, shorter ones for under windows, or narrow shelves for hallways.
- Back panel bonus: A removable or recessed back is gold — you can paint or wallpaper it for extra flair.
- Details: Look for molding, trim, or curved edges that can really shine once they’re painted.
Pro tip: Don’t overlook ugly finishes. That orange oak or dark mahogany stain? Totally coverable. You’re looking for bones, not beauty — yet.
🧽 Step-by-Step: How to Paint and Refresh a Thrifted Bookshelf
- Clean it well — Wipe down all surfaces with warm, soapy water or a vinegar mix to remove grime and residue.
- Sand lightly — A quick pass with medium-grit (120–150) sandpaper will rough up the surface and help paint adhere.
- Prime it — Especially important for laminate or glossy finishes. Primer prevents peeling and ensures long-lasting color.
- Paint your masterpiece:
- Chalk paint: Great for a soft, velvety, vintage-inspired finish.
- Latex or acrylic paint: Perfect for smooth, durable coverage and bold colors.
- Spray paint: Works well for smaller shelves or intricate cutouts.
- Add accents (optional):
- Paint the back panel a contrasting color for a pop of personality.
- Use peel-and-stick wallpaper or fabric inside the back for pattern and texture.
- Try color-blocking the shelves for a fun, graphic look.
- Seal it: Use a matte or satin polyurethane for protection — especially if you’ll be styling it with plants or heavy books.
🎨 Paint Ideas That Always Work
- Moody Hues: Deep green, navy, or charcoal for a sophisticated, cozy vibe.
- Neutral Tones: Cream, beige, or greige for a timeless, versatile look.
- Bright + Bold: Mustard, coral, or cobalt for an artistic punch in a neutral room.
- Two-Tone: Paint the exterior one color and the interior another for dimension.
- Natural Finish Combo: Leave some wood exposed (like the top or edges) for contrast and warmth.
🌿 Bonus Ideas for Repurposing Bookshelves
- Display Shelf: Use it for art, plants, or curated décor instead of just books.
- Bar Cabinet: Add a mirrored back and glass shelves for a stylish cocktail setup.
- Entryway Organizer: Paint and add baskets or hooks to create a functional drop zone.
- Bathroom Storage: Narrow shelves painted white or sage look beautiful filled with towels and jars.
- Mini Office: Style one with bins, boxes, and a few decorative touches to keep your workspace cute and clutter-free.
8. Wicker Baskets — From Rustic Finds to Chic Storage Goals
There’s something magical about a good wicker basket. They’re versatile, charming, and endlessly useful — but thrift store versions often look a little too “grandma attic” to blend with modern décor. The good news? With a bit of paint (and maybe some fabric or leather touches), you can easily turn them into stylish, functional pieces that belong in a high-end home store.
🕵️♀️ What to Look for at the Thrift Store
The basket aisle is a goldmine once you know what to spot:
- Material: Look for real wicker, rattan, or seagrass — they hold up beautifully and take paint well. Avoid brittle or broken weaves.
- Structure: Make sure the frame feels firm and solid. Sagging bottoms or loose weaving can sometimes be fixed, but large gaps might not be worth it.
- Shape: Rectangular baskets are perfect for shelving and storage; round or lidded ones work great as statement décor.
- Handles: A bonus! Leather or rope handles elevate the look and make them practical.
- Color: Don’t worry about it. Faded honey brown or uneven tones will disappear once you paint or whitewash.
Pro tip: If it smells musty, don’t panic — a vinegar-water wipe-down and a day in the sun works wonders.
🧽 Step-by-Step: How to Paint and Refresh Wicker Baskets
- Clean thoroughly — Use a soft brush or vacuum with a brush attachment to remove dust from crevices. Then wipe down with a damp cloth.
- Dry completely — Let the basket air-dry for several hours before painting. Damp wicker repels paint.
- Prime (optional) — For darker or uneven tones, a spray primer helps with even coverage.
- Paint it:
- Spray paint: The easiest method — gives even coverage and reaches into woven areas.
- Chalk paint + brush: Great for softer, rustic, or farmhouse looks.
- Dry brushing: Use minimal paint on your brush and lightly sweep over raised areas to highlight texture.
- Seal it (optional): If it’ll be used in a humid space (like a bathroom), finish with a clear matte spray sealer for durability.
🎨 Paint Ideas That Always Work
- White or Cream: Clean, airy, and timeless. Instantly brightens any space.
- Matte Black: Dramatic and modern — great for contrast against white walls or shelves.
- Soft Neutrals: Taupe, beige, or sage green for natural, earthy vibes.
- Color Dip: Paint just the bottom half for a trendy, two-tone look.
- Metallic Accents: Try brushed gold or bronze on handles or rims for a touch of glam.
🌿 Bonus Ideas for Repurposing Wicker Baskets
- Planter Covers: Slip your houseplants (in their pots) inside a painted basket for a designer finish.
- Bathroom Storage: Use smaller baskets for rolled towels, soaps, or toilet paper — practical and pretty.
- Wall Decor: Hang flat baskets in groups for a stunning boho wall display.
- Picnic or Blanket Bins: Perfect for cozy throws in a living room or porch.
- Desk Organization: Keep your workspace aesthetic by using baskets for office supplies or mail sorting.
Our Puzzle Collection
Now Available on Amazon

The Introvert’s Word Search
Relaxing puzzles for quiet moments. Perfect for homebodies and thoughtful minds.
🛒 Buy on Amazon⭐⭐⭐⭐⭐

Sudoku Master Challenge
Sharpen your logic with hundreds of Sudoku puzzles, from beginner to expert levels.
🛒 Buy on Amazon⭐⭐⭐⭐⭐

Cozy Fall Nostalgia Word Search
Embrace the autumn season with this cozy collection of fall-themed word searches.
🛒 Buy on Amazon⭐⭐⭐⭐⭐